My lab is deliberately isolated — an automation VM (CLAUDDEB) sits behind a virtual pfSense firewall on a segment (10.10.0.0/24) that my home network can’t reach. That isolation is great until you’re out of the house and want to check your Grafana dashboards, which only listen inside that segment.
I already use Tailscale for casual remote access, and I’ll be honest up front: for pure convenience, Tailscale wins — it punches through NAT automatically with zero firewall work. But this project wasn’t about convenience. It was about building the thing Tailscale is made of. Tailscale is WireGuard under the hood; hand-rolling raw WireGuard on pfSense teaches you how VPNs actually work — keys, peers, routing, firewall rules, NAT — at a level the managed tool deliberately hides. So I built it from scratch, kept Tailscale as my daily driver, and got a genuinely brutal debugging lesson in the process.
The goal, and the one hard constraint
Reach Grafana (and the rest of the lab) from my phone on mobile data, over a WireGuard tunnel terminating on my lab pfSense — the inner firewall. The catch is the topology: that pfSense’s “WAN” isn’t the internet, it’s my home LAN (192.168.1.x), bridged in from a VMware VM. So an inbound connection from my phone has to cross two firewalls:
Phone (mobile data)
   │  UDP 51820 to my home's public IP
   ▼
Home ISP router  ── port-forward ──►  pfSense WAN (192.168.1.189)
                                          │
                                          ▼
                                     Lab segment (10.10.0.x — CLAUDDEB, Grafana)
   phone gets a VPN address on 10.20.20.x and is routed into the lab
Before anything else I checked I wasn’t behind CGNAT (carrier-grade NAT) — if the ISP shares one public IP across customers, inbound WireGuard is impossible without a relay. My router’s WAN showed a real public IP matching “what’s my IP,” so I was clear to port-forward.
The build
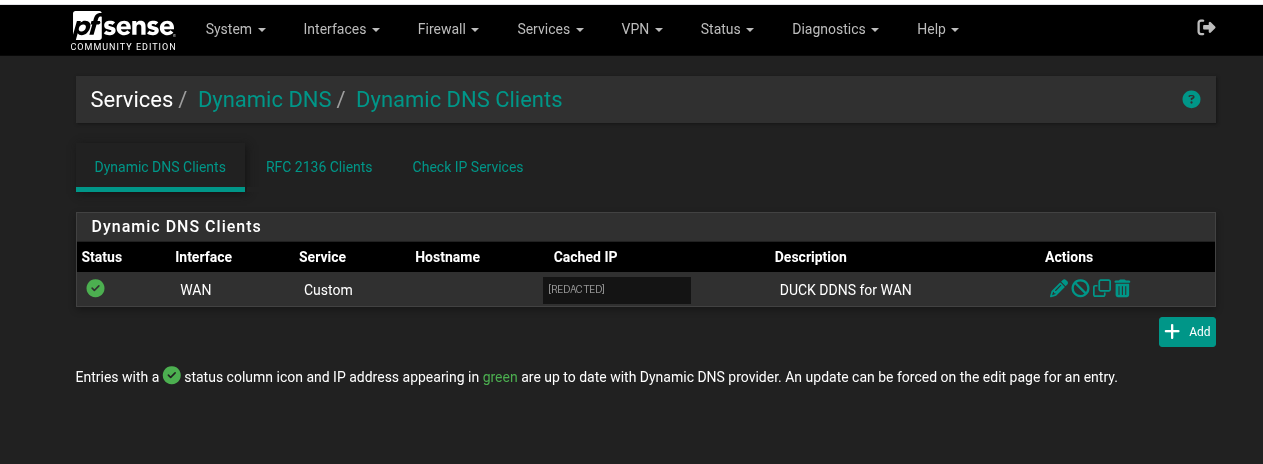
Dynamic DNS first. My public IP is dynamic, so a hard-coded IP in the client would break on the next lease change. I set up DuckDNS via pfSense’s Custom DDNS type (DuckDNS isn’t a built-in provider), using an update URL with an empty &ip= so DuckDNS auto-detects the public IP rather than pfSense’s private WAN address — a neat fix for the nested-network wrinkle.
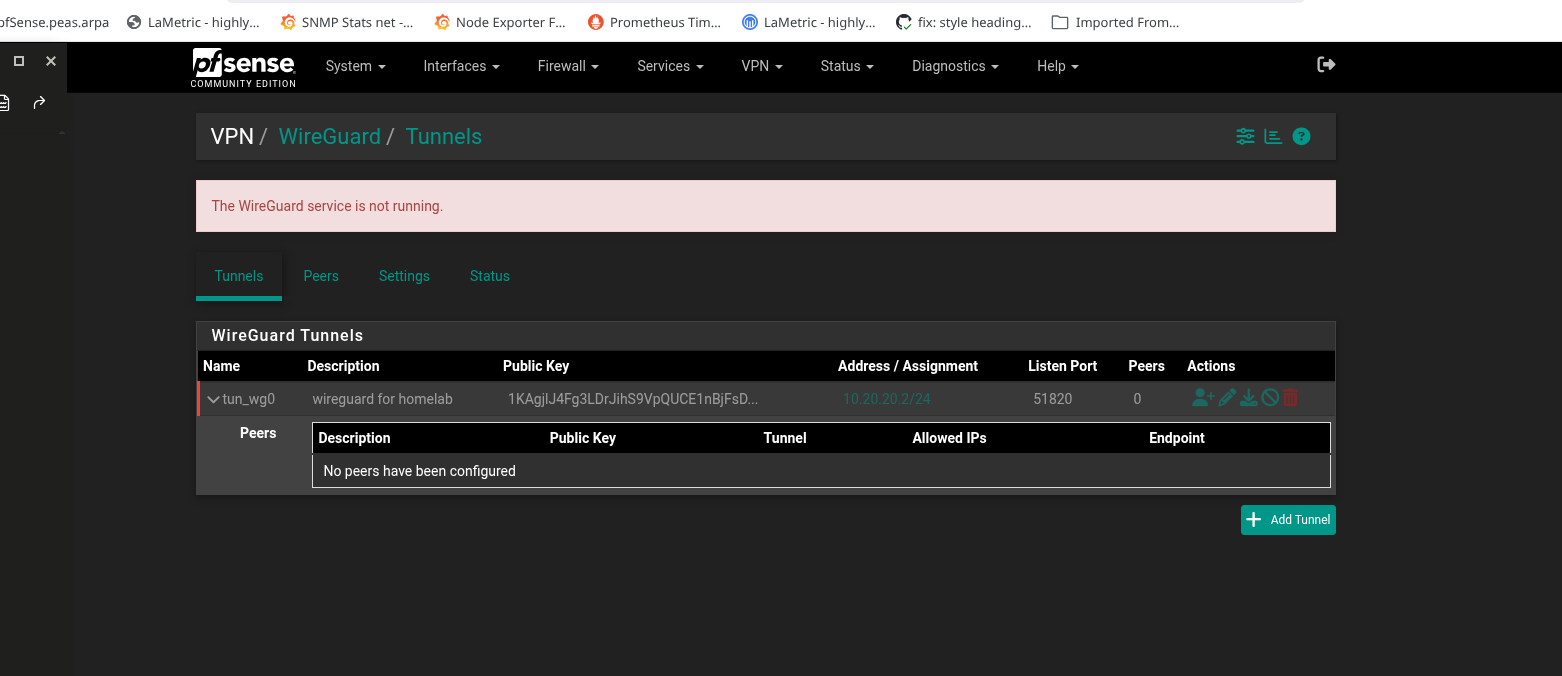
The WireGuard tunnel. Installed the WireGuard package, created a tunnel on UDP 51820 with the VPN subnet 10.20.20.1/24 — deliberately distinct from the lab (10.10.0.x) and home (192.168.1.x) networks, because overlapping subnets are a classic VPN foot-gun.
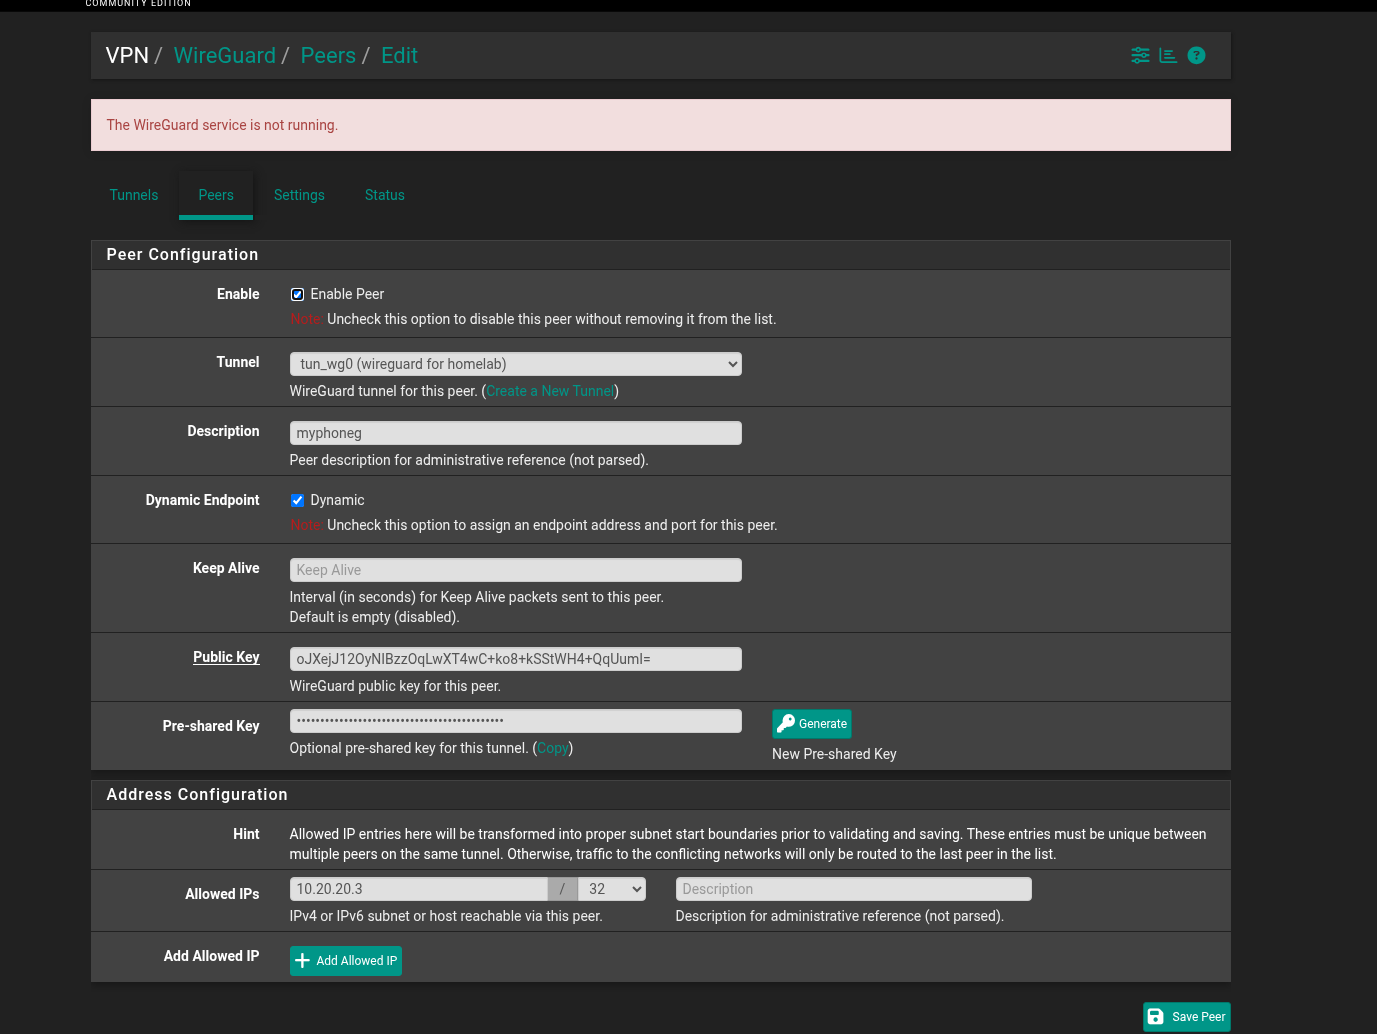
The peer (my phone). I generated the keypair in the phone’s WireGuard app so the private key never leaves the device, and pasted only its public key into pfSense. Assigned the phone the VPN address 10.20.20.3, added the generated pre-shared key for an extra layer, and set a 25-second keepalive so mobile NAT doesn’t drop the tunnel.
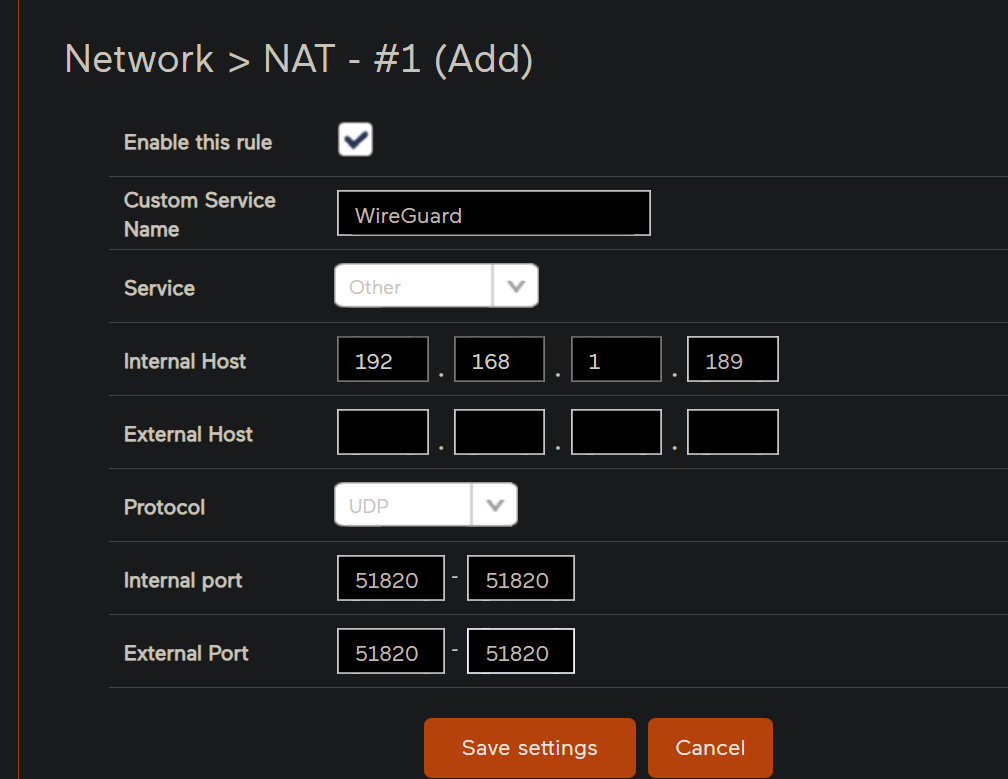
The port-forward. On the home router: forward UDP 51820 to pfSense’s WAN IP. I also set a DHCP reservation so pfSense’s WAN never wanders off 192.168.1.189 — and had to reserve it against pfSense’s actual VMware MAC (00:0c:29:…), not the host desktop’s, since the bridged VM is a separate device on the network.
Firewall rules. Two on pfSense: a WAN rule allowing UDP 51820 in, and a rule on the WireGuard interface allowing the tunnel traffic onward. Then enabled the service.
The phone. Filled in the client — addresses 10.20.20.3/32, the server’s public key + pre-shared key, endpoint set to the DDNS hostname, and — importantly — Allowed IPs of 10.10.0.0/24, 10.20.20.0/24 so lab traffic routes into the tunnel (split-tunnel; normal browsing stays direct).
Switched the phone to mobile data, toggled the tunnel on, and:
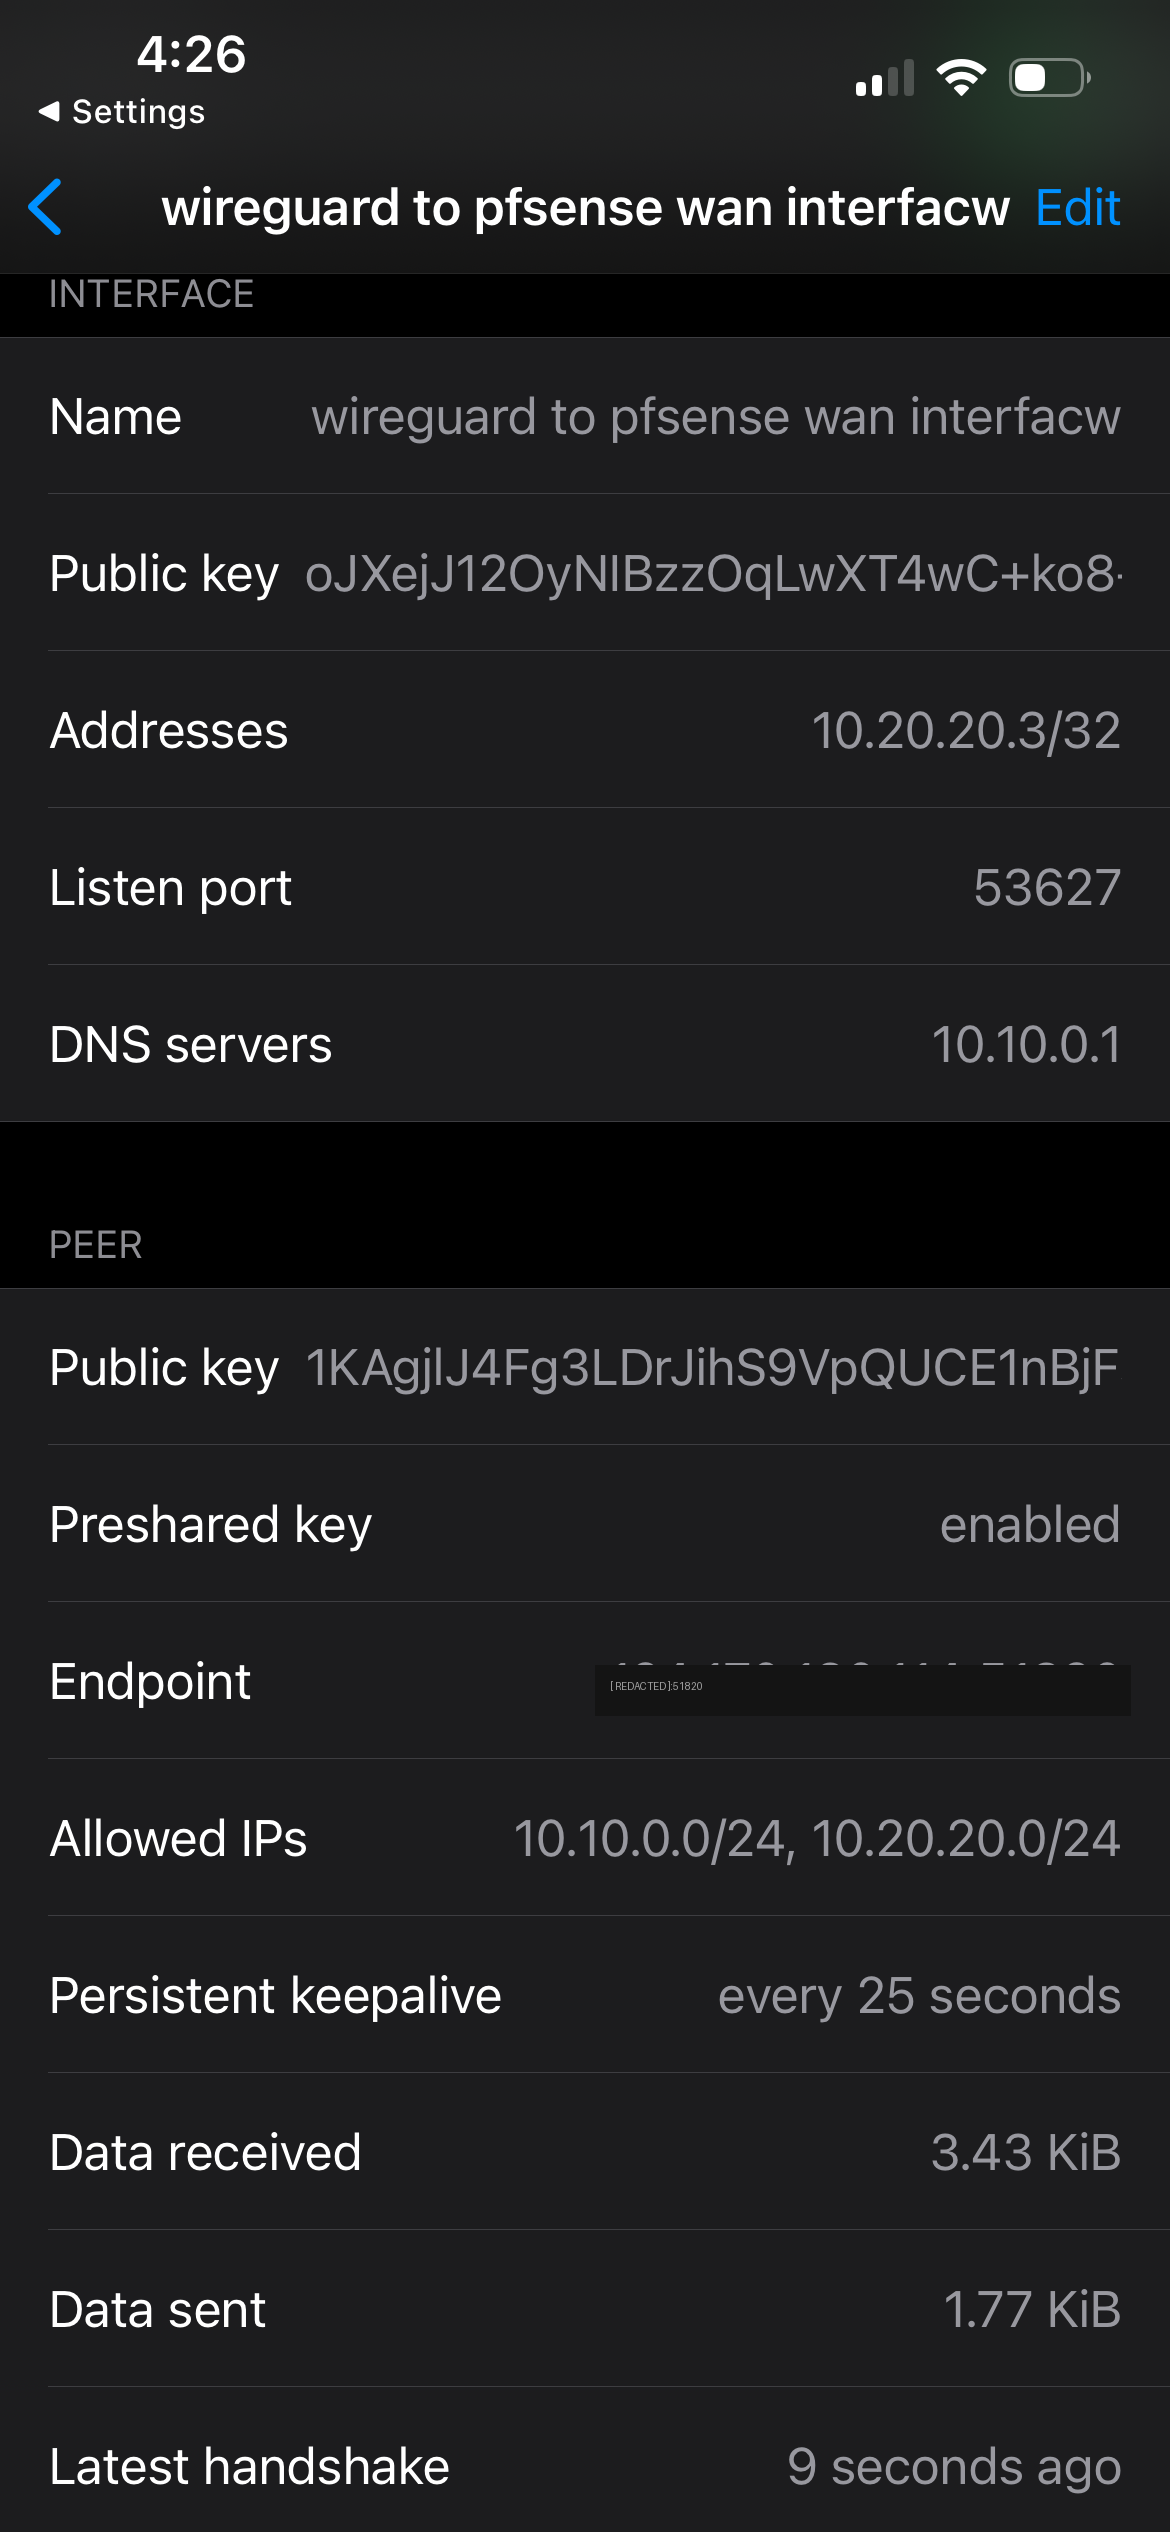
A handshake. The tunnel was up from the outside. I figured I was done.
I was not done.
The four-layer debug
Grafana wouldn’t load. Not on the phone, not from my host machine. What followed was the most instructive part of the whole project: four independent failures, each with the exact same symptom — “connection timed out” — but a completely different root cause at a completely different layer. The only way through was to stop guessing and read the actual packets.
Wall 1 — the tunnel wasn’t a routed interface
pfSense’s own login (10.10.0.1) loaded over the tunnel, but no other lab host did. The difference: reaching pfSense terminates at the firewall; reaching CLAUDDEB requires pfSense to route tunnel traffic onward into the LAN. I’d never assigned the WireGuard tunnel as a pfSense interface — so it existed, but pfSense wouldn’t route from it. Assigning it (Interfaces → Assignments) and adding a pass rule on its new interface tab fixed the routing… but it still didn’t load.
Wall 2 — the return path
Time to read packets. On CLAUDDEB, tcpdump showed the phone’s SYN arriving — but no SYN-ACK going back. The request reached the box; the reply vanished. Classic asymmetric routing. I added an Outbound NAT rule so the traffic would appear to come from pfSense’s LAN IP (a directly-reachable neighbour), which CLAUDDEB could reply to cleanly. Progress — but still no load.
Wall 3 — a silent host firewall
Back to tcpdump. Now the SYN arrived, but CLAUDDEB sent nothing back — not even a reset. A silent drop is the signature of a firewall.
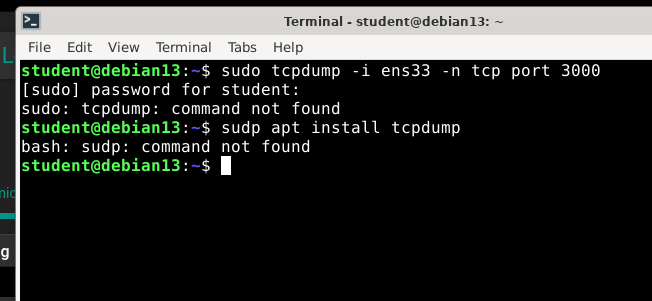
ufw status said inactive — but that’s just a frontend. Checking the raw ruleset revealed nftables with a policy drop on the input chain, allowing only a handful of ports, and only over the Tailscale interface. My Grafana port (3000) from the LAN/VPN wasn’t permitted, so the kernel dropped every SYN before Grafana ever saw it.
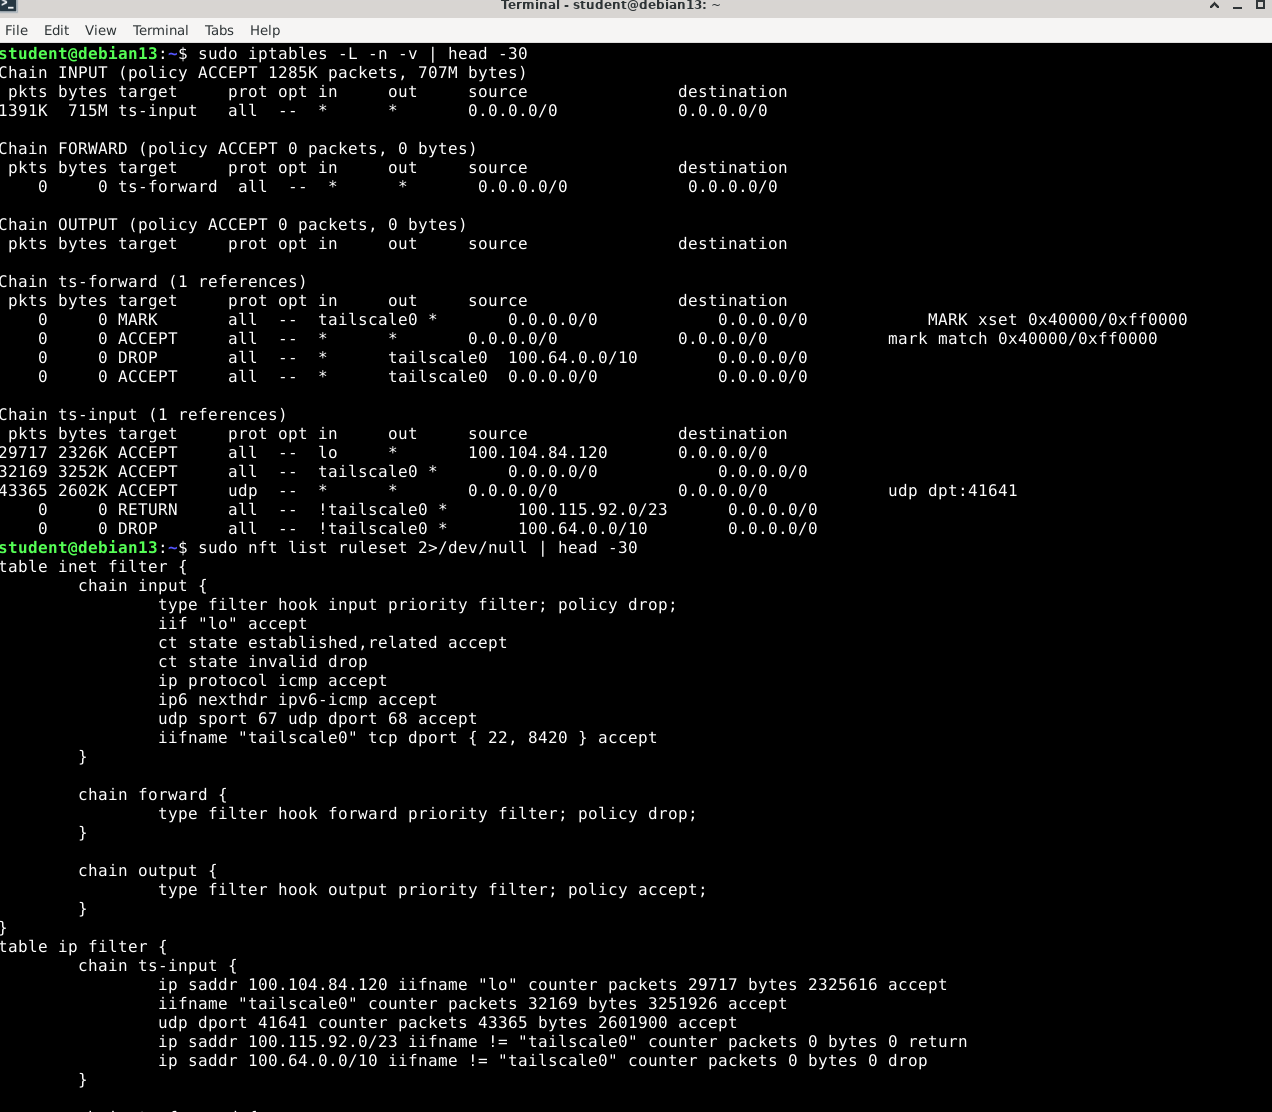
Two nft rules allowing TCP 3000 from the lab and VPN subnets (made permanent in /etc/nftables.conf), and now tcpdump finally showed CLAUDDEB replying with SYN-ACK. So close. Still hanging.
Wall 4 — the missing return route
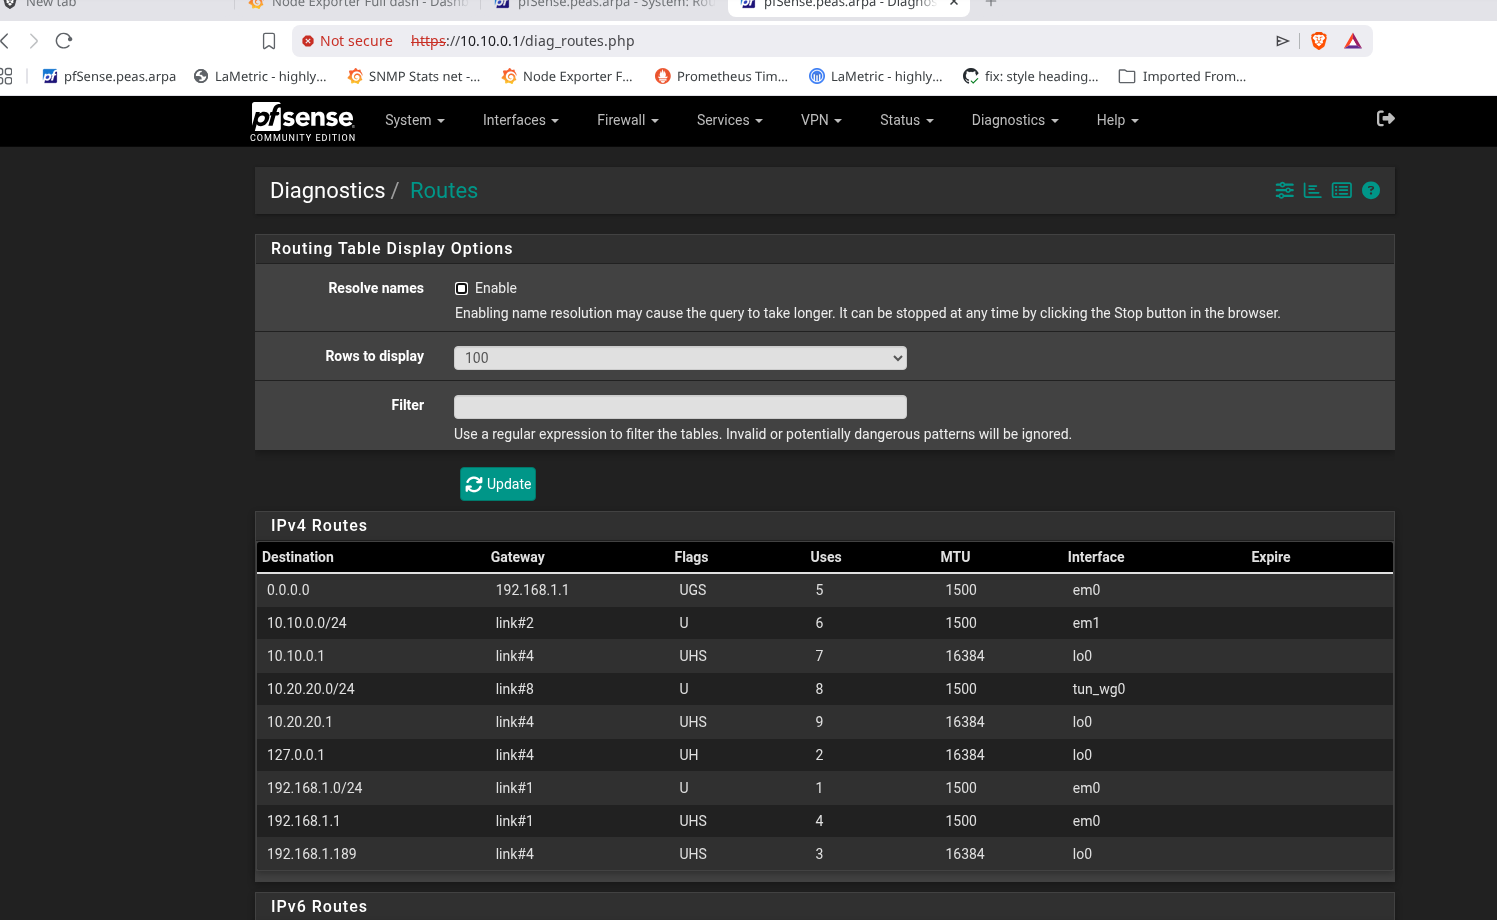
The tcpdump told the final story: CLAUDDEB’s SYN-ACK (destined for 10.20.20.3) was leaving the box, but the phone never received it and kept resending its SYN. The reply was reaching pfSense and dying there. Checking pfSense’s routing table: there was no route for 10.20.20.0/24 at all. pfSense received the reply, couldn’t find a route to the VPN subnet, and dumped it out the default route (the WAN) into the void.
The fix was almost anticlimactic: the WireGuard interface had been assigned with no IP (IPv4 = None). Giving it the tunnel address 10.20.20.1/24 made pfSense install the connected route automatically.
Reloaded on the phone. Grafana’s login appeared.
Why this was worth it
Every one of those four walls said “connection timed out.” Same symptom, four different layers:
- pfSense — tunnel not assigned as a routable interface
- NAT — asymmetric return path
- CLAUDDEB — a hidden nftables
policy dropeating the SYN - Routing — no return route for the VPN subnet, so replies went out the WAN
You cannot guess your way through that. The only thing that worked was reading tcpdump — SYN vs SYN-ACK, which source IP, reply or silence — and the pfSense firewall logs — pass vs block. Each capture pointed at exactly one layer. That evidence-driven, layer-by-layer approach is how real network debugging works, and it’s a far better story than a build that worked first try.
Security notes
- The only inbound opening on the home router is a single UDP port-forward — no DMZ, nothing else exposed.
- WireGuard is key-based with an added pre-shared key; the phone’s private key never left the phone.
- Grafana ended up bound to all interfaces so the VPN could reach it — which is fine, because port 3000 isn’t forwarded on the router, so it’s only reachable from inside the lab or through the authenticated tunnel.
- I’ve redacted my public IP from the screenshots here; there’s no reason to publish the exact address and port your VPN listens on.
Tailscale vs. this
To be clear-eyed: Tailscale would have done all of this in ten minutes with none of the CGNAT checks, port-forwarding, DDNS, or firewall rules — because it solves NAT traversal for you. The point of building raw WireGuard wasn’t to replace it. It was to understand, hands-on, the machinery Tailscale abstracts away — and to run a VPN that depends on no third-party control plane. Tailscale is the automatic transmission; this was learning to drive stick. For a networking/security portfolio, knowing the manual matters.
What’s next
With remote access into the lab sorted, the natural next step is turning the monitoring stack into a security monitoring stack — Suricata IDS on pfSense, its alerts surfaced in Grafana. But that’s the next post. This one gets to end on a hard-won 200 OK.